
Why Natural Dyes Matter
Natural fabric dyeing isn't just a craft—it's a return to how textiles were colored for thousands of years. Before synthetic dyes arrived in the 1850s, people worked with what nature provided. Plants, roots, insects, and minerals created the colors in your grandmother's quilts.
Today, we're rediscovering these techniques for good reason. Natural dyes create softer, more nuanced colors that actually improve with age. They're also gentler on fabrics, the environment, and your hands. Plus, there's something genuinely satisfying about watching a piece of white cotton transform into golden yellow or deep rust using ingredients from your kitchen garden.
Understanding Mordants: The Essential Step
Here's where most beginners struggle. A mordant is a chemical compound that helps dye molecules bond permanently to fabric fibers. Without it? Your beautifully dyed fabric will fade in the first wash.
The most common mordants are alum (aluminum potassium sulfate) and tannin. Alum is the workhorse—it brightens colors and improves fastness on nearly everything. Tannin adds depth and shifts colors. Iron, though less forgiving, creates stunning dark tones when used carefully.
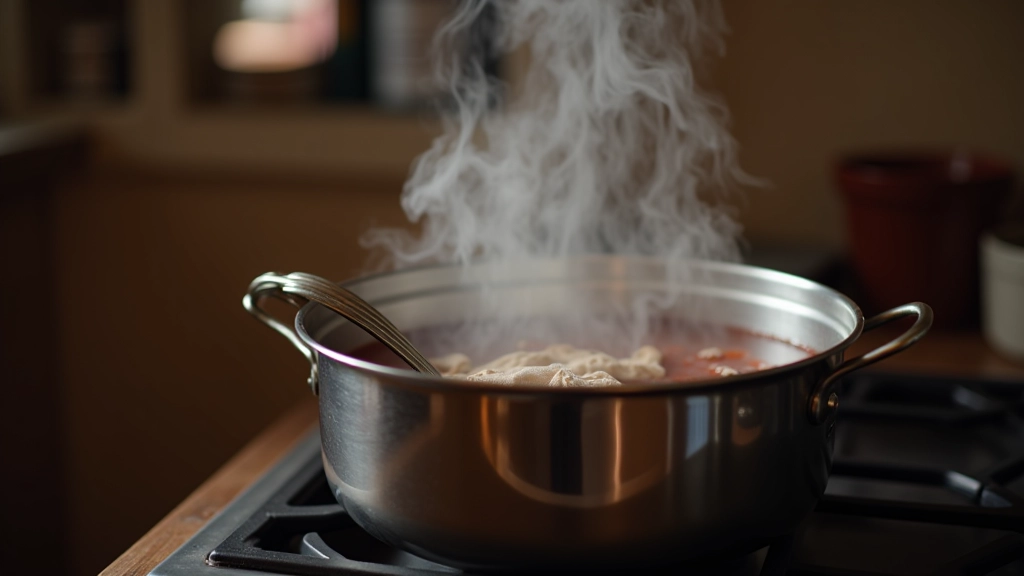
A typical mordant bath uses about 10-15% weight of fabric in alum, dissolved in water around 180°F. You'll simmer the fabric for 45-60 minutes, let it cool overnight, then you're ready for the actual dye. The process takes patience, but this step makes the difference between colors that fade and colors that last years.
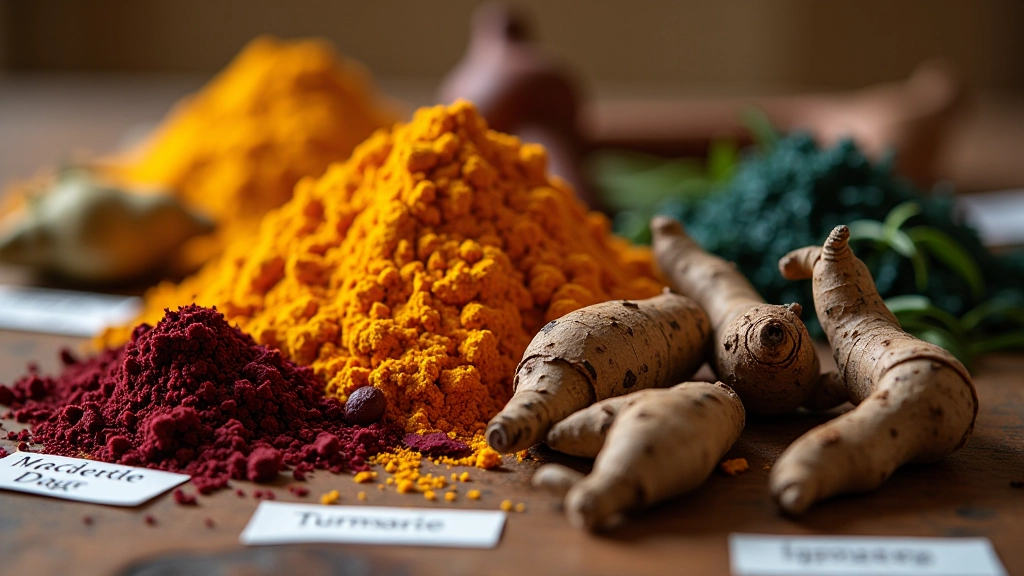
Plant-Based Dyes: Your Starting Point
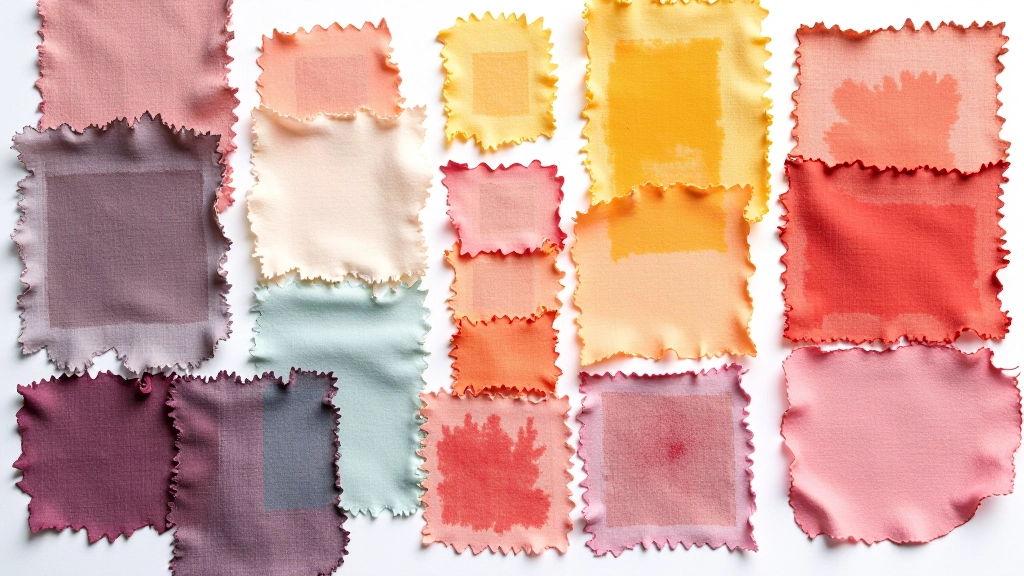
Madder root is the heavyweight champion of natural dyes. It produces reds, oranges, and browns depending on your mordant and iron additions. You'll need to plan ahead though—dried madder roots require a 24-hour soak before heating.
Weld creates reliable yellows and greens. It's forgiving, works with basic equipment, and produces colors that'll last through dozens of washes. Woad and indigo deliver blues, but indigo's trickier—it doesn't dissolve in regular dye baths. You'll need an indigo vat with a specific pH and oxygen balance.
For reds without madder, try cochineal (an insect-based dye) or madder alternatives like Japanese weld. Pomegranate skin, walnut husks, and avocado pits give warm browns and pinks. The learning curve flattens quickly once you've done 2-3 dye sessions.
Pro tip: Keep detailed notes on every batch. Record the dye material amount, water temperature, fabric weight, and mordant type. After your third project, you'll have a reliable reference guide that beats most textbooks.
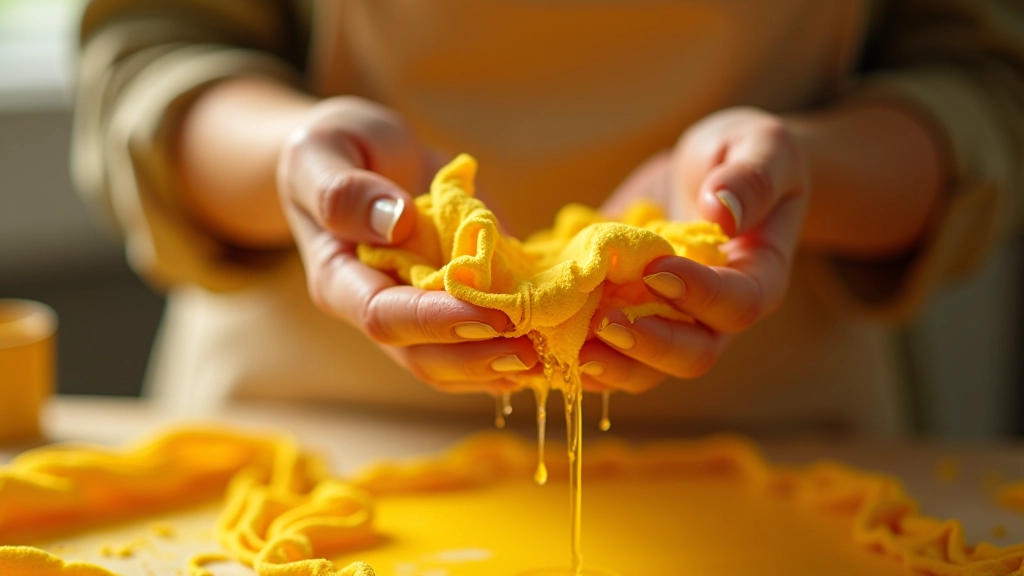
The Dyeing Process: Temperature and Timing
The actual dye bath requires gentle heat. Most natural dyes extract best between 160-180°F. Too hot, and you risk damaging wool. Too cool, and the dye won't fully bond.
You'll simmer the pre-mordanted fabric in your dye bath for 45 minutes to 2 hours, depending on how deep you want the color. Cotton needs longer than wool. Linen's somewhere in between. The fabric should be submerged and gently moved occasionally—don't let it bunch or fold.
After dyeing, you'll cool the bath slowly. Don't shock the fabric with cold water—gradual cooling sets the color better. Rinse in cool water until the rinse water runs clear, then wash gently with mild soap. Dry away from direct sunlight to prevent uneven fading.
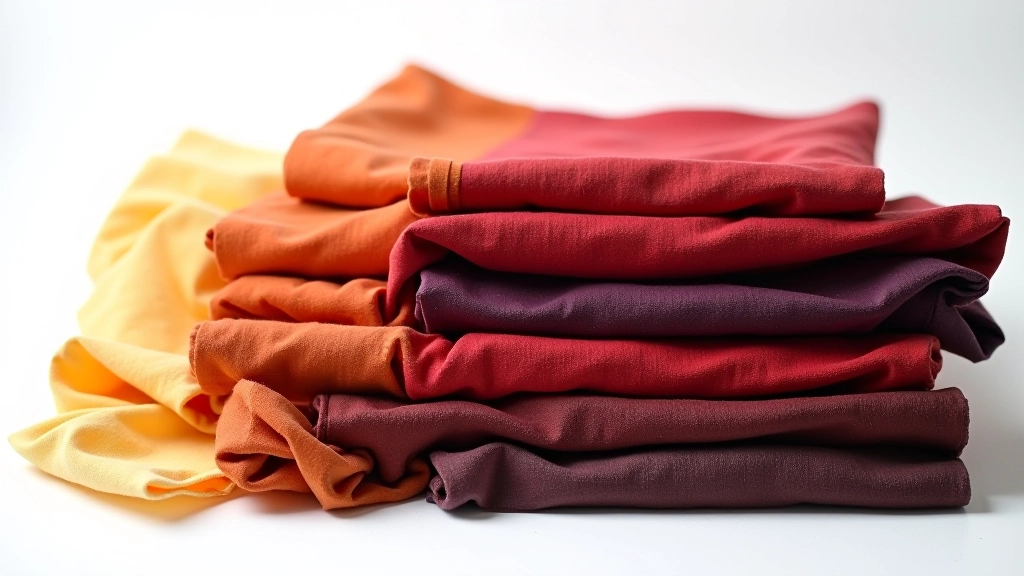
Color Variations and Iron Shifts
One beautiful aspect of natural dyeing is unpredictability. The same madder root batch won't produce identical reds twice. Water hardness, ambient temperature, and even the season affect results.
Iron additions deserve special mention. A tiny pinch of iron powder or ferrous sulfate in your dye bath will shift reds toward purple or brown, yellows toward olive, and create stunning dark tones. But iron's unforgiving—use a quarter-teaspoon at a time in a large bath, stir thoroughly, and test on a scrap before committing.
Tannin pre-baths also shift colors. If your madder red looks too orange, a tannin treatment first will deepen it toward burgundy. These modifier baths are where natural dyeing becomes truly artistic. You're not just following a recipe—you're making intentional color choices.
Getting Started Today
You don't need a chemistry degree or expensive equipment. Start with a basic kit: a stainless steel pot, thermometer, alum from a craft supplier, and a single natural dye like madder or weld. Dye one small piece of cotton or wool. See what happens. Take notes.
Natural fabric dyeing rewards patience and curiosity. Your first batch might not be perfect—and that's completely fine. It's still going to be more interesting than anything you'd find in a store. The colors will have character, depth, and a story. That's the real appeal. You're not just coloring fabric. You're connecting with a craft that humans have practiced for millennia.